
This guide will show you how to add Workshop Scenarios to your Arma Reforger Server.
Order an ArmA Reforger Server today with Citadel Servers
Adding Workshop Scenarios on your Arma Reforger Server
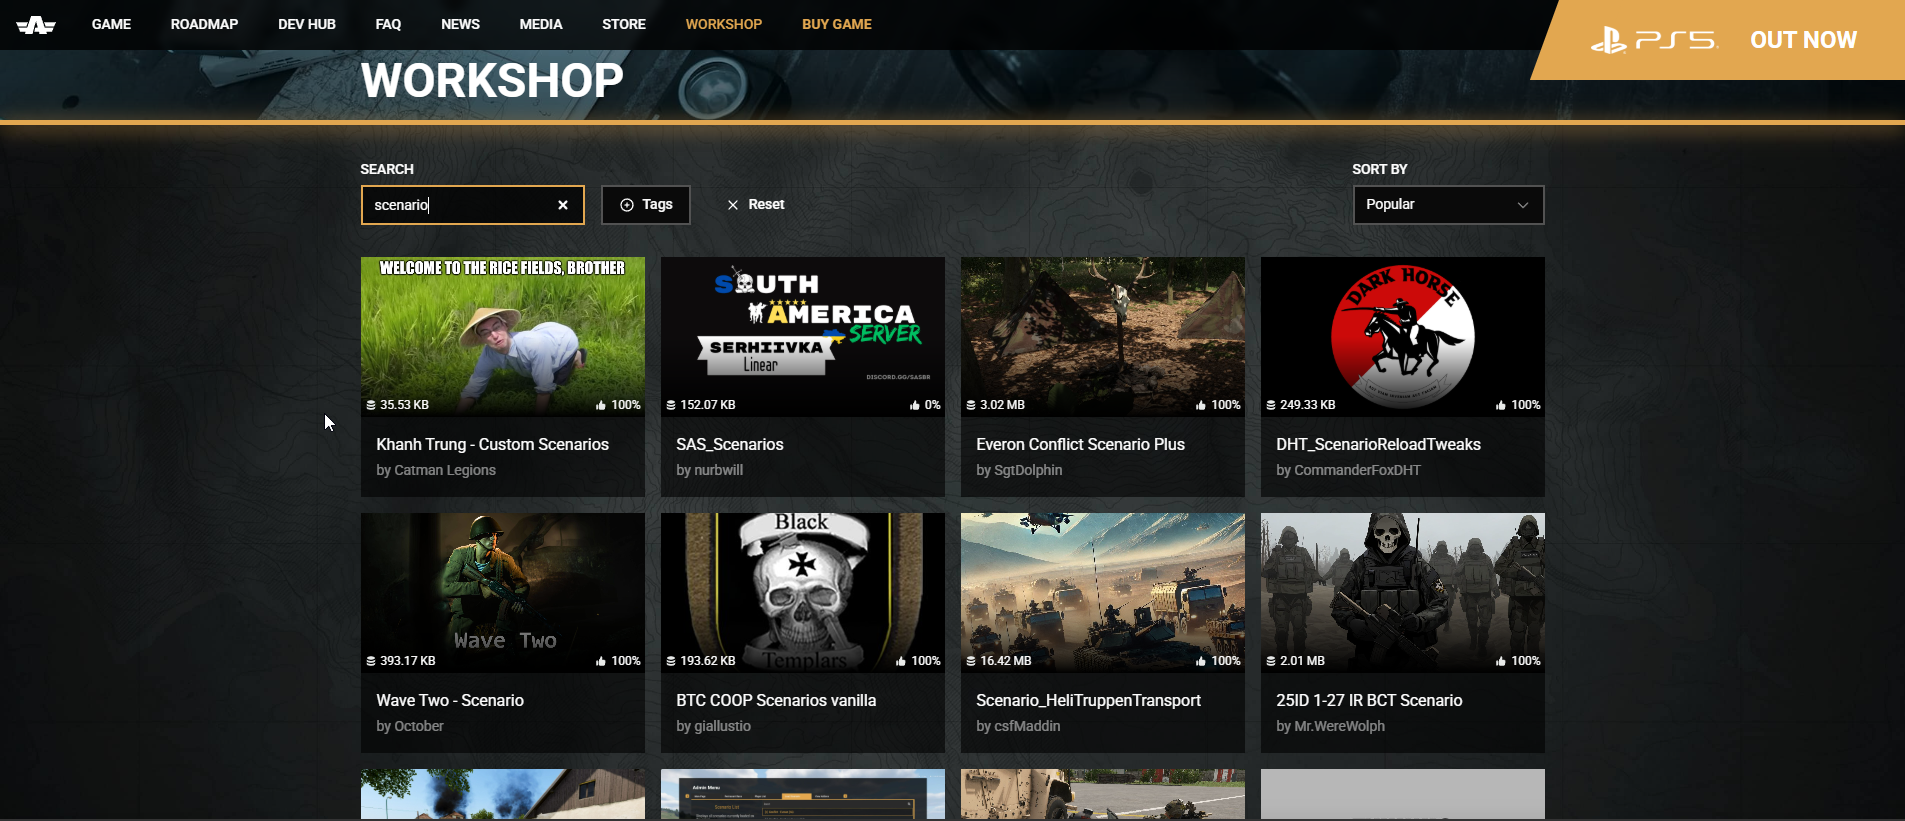
1. Open the Arma Workshop and select the scenarios you want to add to your server.
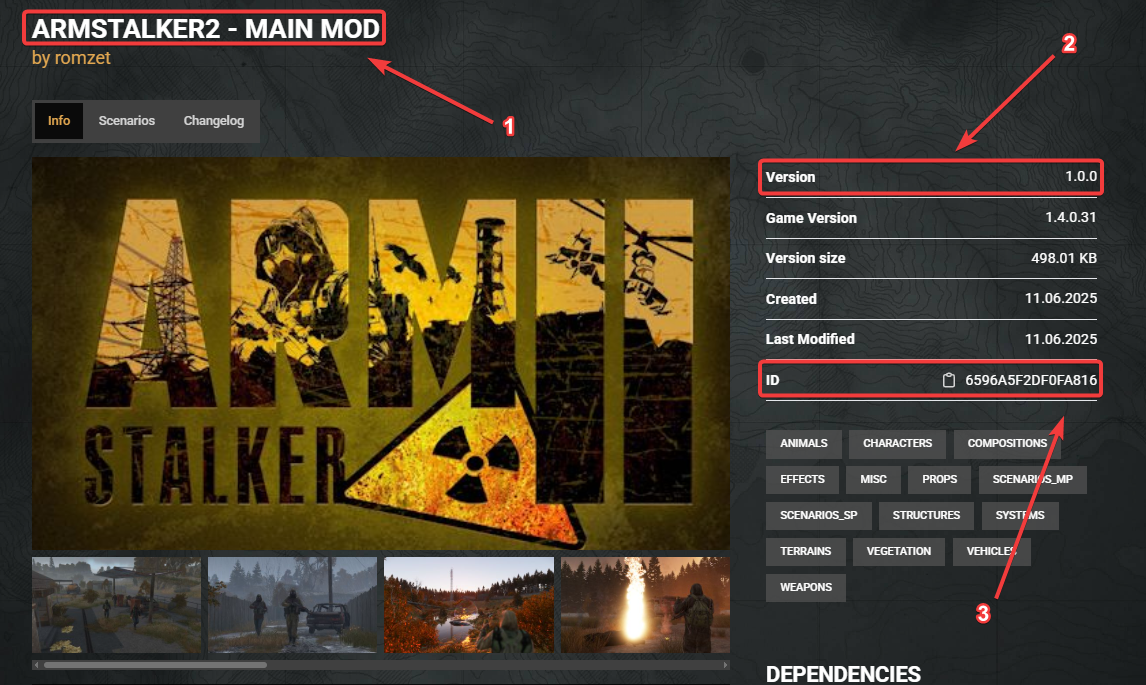
2. Copy the Mod Information you plan to use.
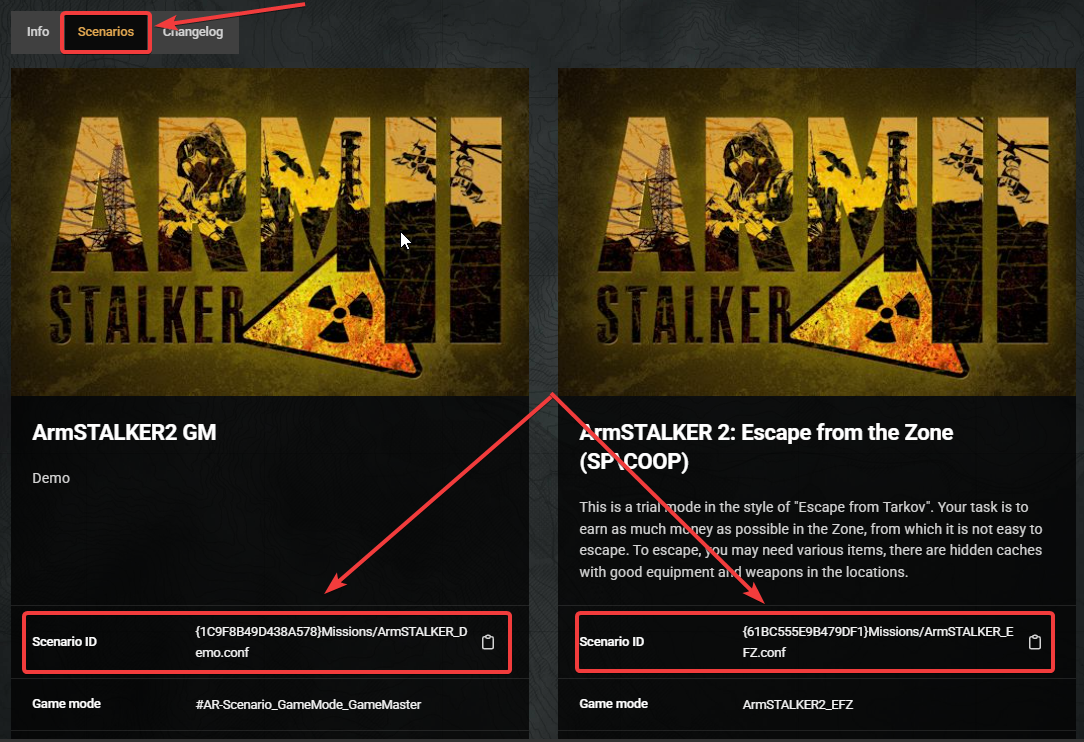
3. Navigate to the Scenario Tab on the Workshop page.
4. Locate and copy the Scenario ID listed.
5. Log in to your Game Panel and Navigate to your Arma Reforger Settings.
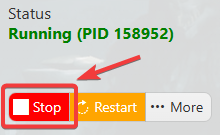
6. Stop the server before making any modifications by clicking the Stop button.
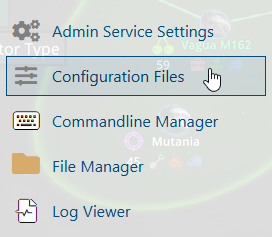
7. Access the Configuration Files Tab.
8. In the configuration files, locate server_config.json, which contains general server settings. Click Text Editor next to the Config Editor.

9. Find the Mod Section and add your mod using the following format:
{
    "modId": "IDHere",
    "name": "NameHere",
    "version": "VersionHere"
}
For more information on how to add mods, you can check our guide here.
10. Set the Scenario ID by inserting the copied ID from the Workshop Page and clicking Save.
"scenarioId": "{A264B84F0298F73E}Missions/WorthyIslandsGM.conf",
For more information on how to change scenario/mission, you can check our guide here.
11. Start your server and enjoy the new Workshop Scenario in Arma Reforger.
Did the above information not work for you? Please contact our support via a ticket.
